
Why You Need A Professional For Your Upholstery Cleaning
November 13, 2023Can Carpet Cleaning Cause Allergy Issues?
November 27, 2023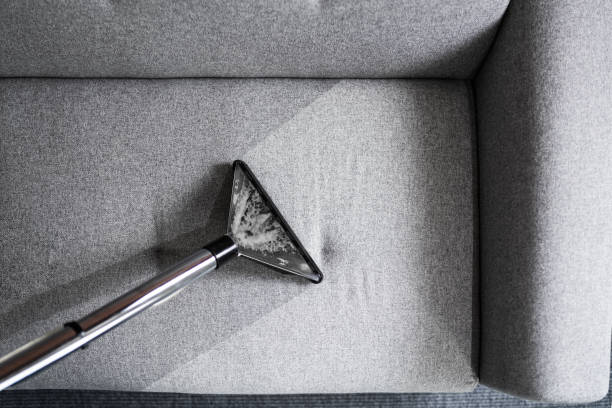
Your sofa serves as a safe haven where you can lay your head after a hectic day. It’s also a relaxation spot where you and your loved ones share merry moments, whether it’s having conversations, playing games, eating snacks, or anything else.
All in all, the sofa does a whole lot of work in your home – even more than you realise. Which is why it’s common for this unsung hero of your living room to become a shadow of its former self. In the hustle and bustle of daily life, our sofas often bear the brunt of spills, crumbs, and daily wear and tear – all of which contribute to turning this comfy zone into an unpleasant one.
That’s the bad news, but there’s good news too. You can maintain your sofa easily, and do so without any magical touch or professional know-how. All you need are the DIY steps for sofa cleaning in this article.
Let’s begin.
Identifying the Fabric Type
Sofas come in an array of materials, ranging from luxurious leather and sumptuous velvet to breathable linen and diverse fabric options. The cleaning process varies depending on the material, underscoring the importance of discerning and identifying different fabric types.
When embarking on the home cleaning journey for your sofa, the pivotal first step involves perusing the care label affixed to the furniture. This label not only reveals the fabric type but also provides invaluable instructions. Deciphering the codes on the label—W, WS, S, or X—unveils distinct care requirements:
- W: Water-based cleaners are suitable, allowing the utilization of common household cleaning agents such as detergent or fabric sofa cleaners.
- S: Solvents necessitate specific chemical solutions and warrant professional dry cleaning.
- W/S: Fabrics in this category can be effectively cleaned with solvents and water-based cleaners.
- X: Vacuuming is the sole permissible cleaning method; using cleaning solutions may potentially damage the fabric.
You are good to go with the DIY cleaning solution if the couch says W or WS, but you should not try these steps if your sofa is an S or X.
Preparation
Embarking on a cleaning mission? Consider preparation as your trusty sidekick, clearing the path for a seamless journey toward a spick-and-span space. As you gear up to rejuvenate your sofa, the first step is to gather your cleaning allies: mild detergent, water, white vinegar, a soft brush, and any other necessary equipment.
Why is this pre-cleaning ritual crucial? Well, having these supplies at your disposal isn’t just a logistical nicety; it’s the secret sauce to a methodical and triumphant sofa-cleaning escapade. Think of it as ensuring you’re armed with the right tools, poised for a successful assault on dirt and grime. After all, a well-prepared cleaning adventure is a victorious one!
The Vacuuming Process
The art of vacuuming goes beyond mere cleanup; it’s a ritual that banishes lurking dust bunnies and defiant crumbs. This pivotal step holds a significance that transcends ordinary cleanliness, especially when preparing for the grandeur of a general sofa cleaning.
To embark on a thorough sofa cleaning journey, begin by removing any detachable cushions. This seemingly simple act is a protective shield, preventing the inadvertent rubbing of dirt into the fabric you’re trying to cleanse.
You should also establish a regular upholstery cleaning routine, ensuring that your cherished seating maintains its impeccable appearance. By doing so, you’re not only maintaining aesthetics but also preventing dirt from infiltrating the deep recesses of your cushions, where it could stubbornly entrench itself beyond removal.
Spot and Stains Removal
Cleaning upholstery on your own can be quite challenging. But it becomes terrifying when it’s time to tackle the intricate task of removing various stains and spots from the sofa without professional assistance.
But don’t worry – there are ways to effectively handle these stains without any professional help. Sofa stains are notorious, and even a small stain can take away the charm of your sofa. To combat this predicament, take a look at the tips below:
- Mix equal parts water and white vinegar in a spray bottle
- Identify the stained area on the fabric
- Spray the cleaning solution(water and vinegar) onto the stained areas
- Gently blot the treated areas with a clean cloth or sponge
- Then clean! Wipe it off with clean water thoroughly and leave to dry.
In addition to the above, addressing spots and stains before overall cleaning enhances the sofa cleaning process. Doing so will also provide convenient access and ensure effective stain removal throughout the cleaning process.
Sofa Cleaning
After conquering those pesky spots and stains, the next line of action is the sofa cleaning itself. This is one of the concluding steps in the soya cleaning procedure, and it’s usually easier than the preceding steps.
To get started, toss a mix of white vinegar, baking soda, and water in a bucket. To make things a little more interesting, we recommend throwing in some natural soap or detergent to effectively combat grease.
Once you’re done concocting your solution, you should take the following easy steps:
- Moisten a cloth with your cleaning solution, ensuring it is not overly soaked. Alternatively, you can apply the solution to the sofa with a spray bottle.
- Gently sweep the solution-soaked cloth over the fabric using circular motions and a light touch to banish dirt. Pay close attention to the arm rest, cushion, or areas often accumulating skin oils.
- Afterward, use a fresh cloth and water to go over the sofa again, cleaning it thoroughly with water twice to prevent detergent marks.
These are great DIY tips if you don’t have a steam cleaner. However, if you have one of these handy devices at home, you can follow these steps:
- Use the steam cleaner according to the manufacturer’s instructions. This typically involves filling the machine with appropriate amounts of water and any recommended cleaning solution.
- Use an attachment or tool specially for upholstery to avoid damaging the fabric.
- Once the steam cleaner is ready, work methodically in small sections, applying steam evenly to help break down dirt and grime while the attached tool lifts the particles from the fabric.
Drying
This is the final and crucial stage. In this stage, you must leave your sofa to dry for several hours. When drying your sofa, you can dry it with fans or open the windows for ventilation. On another note, you could utilize a dehumidifier to that effect.
Conclusion
The journey to a spick-and-span sofa doesn’t have to be a daunting task. By embracing these DIY steps, you’re not just cleaning your couch but revitalizing a focal point of comfort in your home. Whether you opt for the vinegar and baking soda concoction or harness the power of a steam cleaner, the result is a refreshed and inviting living space.
For those seeking professional assistance or additional tips, visit VIPremier Carpet Cleaning. Our expertise goes beyond carpets, extending to upholstery, ensuring your furniture receives the care it deserves.
Let your home shine with the radiance it deserves – because a clean sofa is more than just a piece of furniture; it’s a reflection of the warmth and care you infuse into your living space.